
By Thomas Berger
So you're probably wondering why an office technology company is blogging about something "Pinterest-y" like turning pallets into outdoor furniture.
Good question.
Well, the answer is that like any other company, RK Black is made up of people who have their own lives, interests, skills and hobbies. These all together make up what our company actually is. So why not display a bit of who we are along with what we do, so that just as much as we feel you can benefit from our company's services, you can benefit from our individual "life hacks," like turning pallets into outdoor benches?
Every week we end up with at least a half-dozen pallets due to our incoming shipments of copiers. These we tend to stack to the side until somebody picks them up, either the trash truck or perhaps some of our associates who might need some firewood ... or somebody odd like me who looks at them and thinks "I think I see an outdoor bench in that pallet."
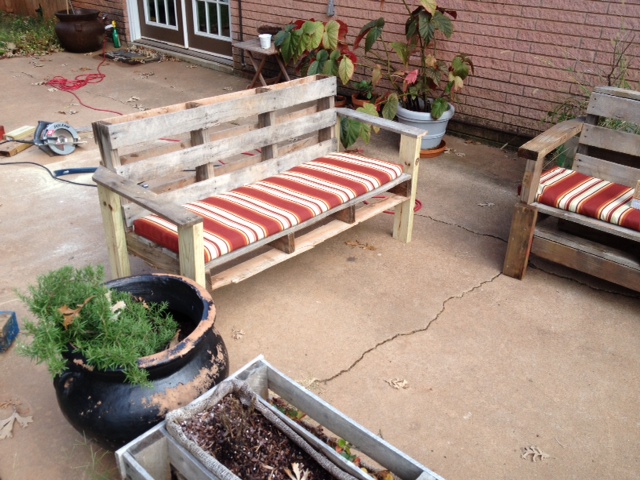
So here is how I turned that vision into reality.
For starters, I selected a pallet built of entirely rot-resistant oak (you can also go with partially of oak, with the larger cross-beams being made of pressure-treated 2x4s, but something rather stout) whose slats were a 1/2 inch thick. Of course, the fewer cracks, splintering and rot, the better.
Materials needed:
- Pallet (Made of sturdy oak or oak and pressure-treated lumber)
- 8-ft pressure-treated 2x4
- Box of star-headed (Torx) no-drill-needed (self-tapping) 2 1/2-in deck screws
Tools needed:
Circular saw or reciprocating saw with a wood-cutting blade
Nail-pulling crow bar
Hammer
Power screw-gun
Tape-measure
Carpenter's square
Marker
Time:
2 or 2.5 hours
Step 1: Transform the pallet into a bench seat and back
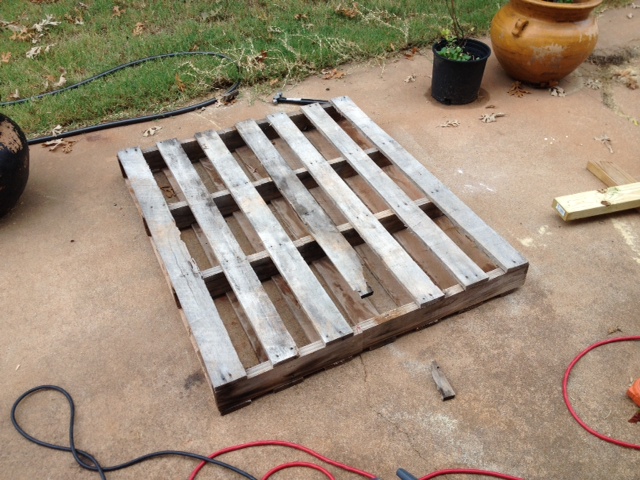
I selected this 48-in x 42-in oak pallet. Notice it had one broken slat, but conveniently it was one I was going to remove anyway. My plan was to turn the pallet into the bench back and the bench seat, with only six saw-cuts, and the 2x4 into four legs — but that later.
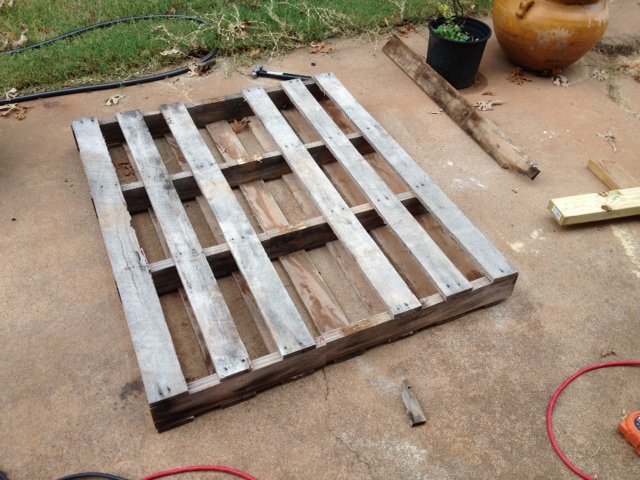
I wanted to make the seat back 17 inches tall, so I measured that off on the pallet, confirming I needed to remove the broken slat. So with my trusty hammer and prybar, off it came.
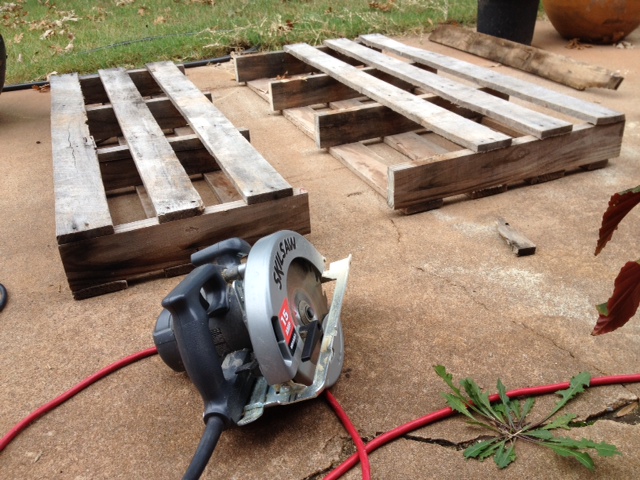
Next, I marked off that same 17 inches from the end of each of the four major cross members where I would make my cuts. After setting my circular saw to cut roughly two inches deep, I cut along marks, flipping over the pallet to complete the cuts from the other side as the boards were too deep for only one cut.
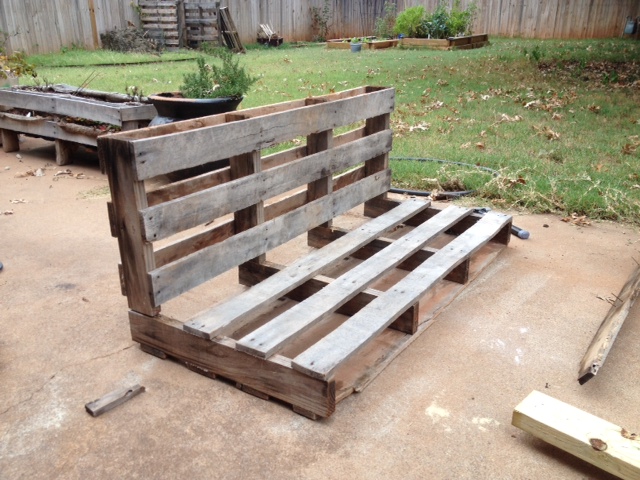
From here, I took the newly minted shorter pallet section — the bench back — and stacked it vertically on the longer section — the bench seat — which I left laying flat. Now you can see the bench taking shape.
Step 2: Make the legs/armrest supports
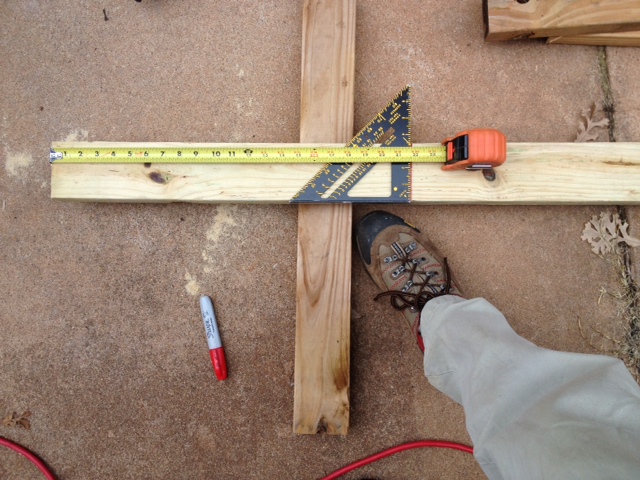
Next I cut the 2x4 into what will double as legs and armrest supports. Cut the 2x4 into four pieces, each 21 3/4-inches.
Step 3: Attach legs to the bench
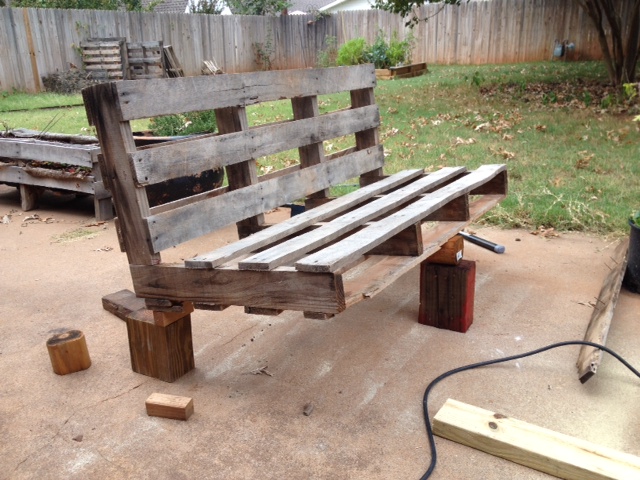 Next, I raised the bench on blocks, the rear of the seat's bottom 8 inches from the ground and the front of the seat's bottom 10.5 inches from the ground. (You can of course change this according to your tastes. You may want the seat higher or lower or leaned back more.)
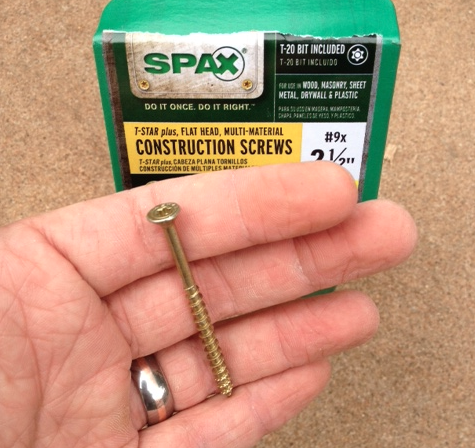
With the bench in that position, I started fastening the legs using a cordless screwdriver. I set up the driver with a Torx bit to drive these 2 1/2-inch self-tapping deck screws through the 21 3/4-inch newly-cut boards into the sides of the seat bottom back. The star-headed (Torx) screws are great as the bits do not easily slip out as do the Phillips.
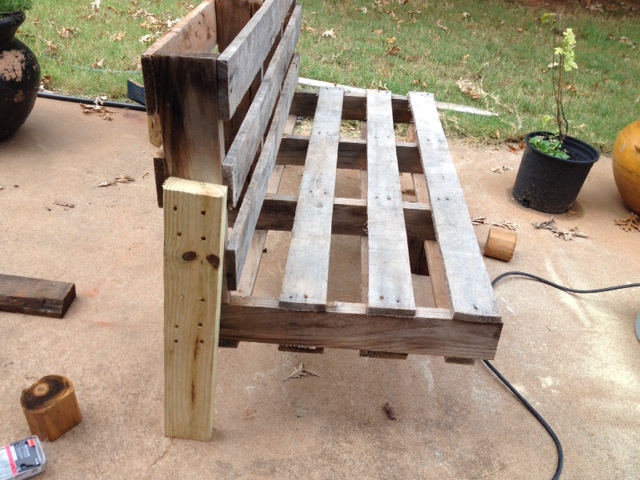
As you can see in the photo above, I ran screws through the leg boards into both the seat back portion and into the bench seat, in effect, not only attaching the leg to the bench, but also fastening the bench sections to each other. I recommend four screws into the bottom section, four into the top and then an additional two into the bottom of the seat back section — close to the seat, just for added support and strength.
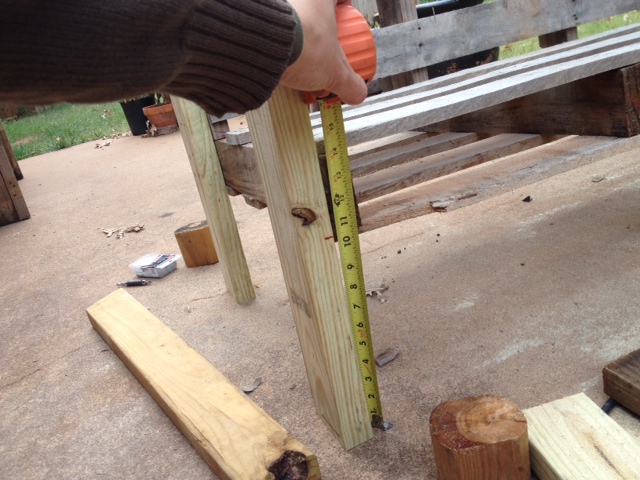
After double-checking the measurement on the front (I still had the bench propped up so the front bottom of the bench was 10 inches off the ground) making sure the front supporting legs were square to the ground, I ran four screws into each front leg, fastening them to the front of the bench sides.
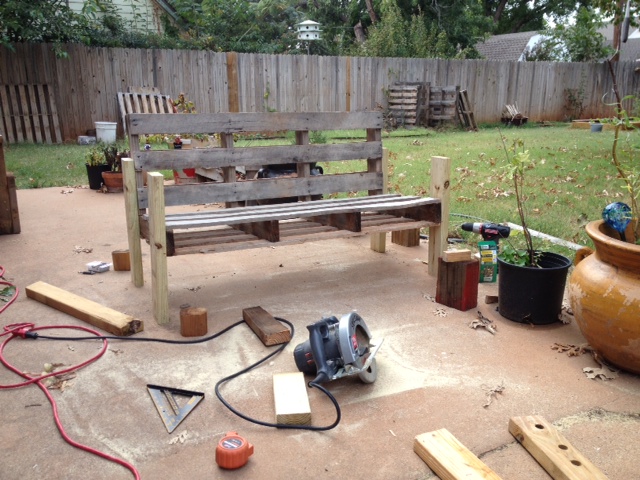
Walla! And now I had a self-supporting bench!
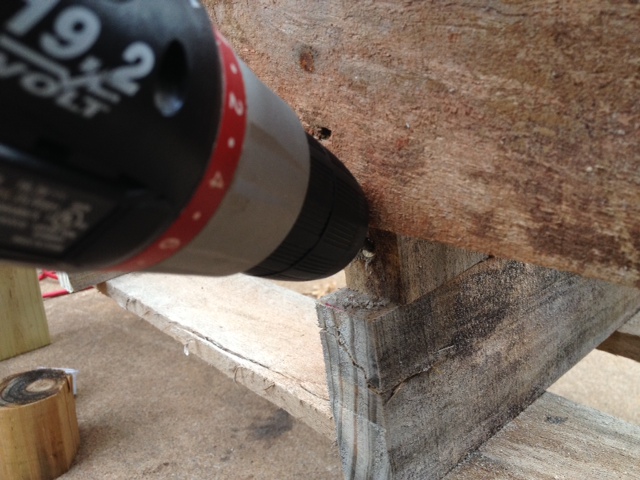
Next, for added strength in the center of the bench, I toe-nailed (ran in at an angle to join two pieces of wood) a screw into each of the two sets of center supporting beams of the seat and back, joining the two sections and preventing the bench from bowing down once weight is put on its center. (Alternatively, you may just want to purchase a second pressure-treated 2x4 cut it in half, and span one half across the bottom of the front of the bench seat and the other across the back, using screws to fasten these spans to the legs.)
Step 4: Make and attach armrests
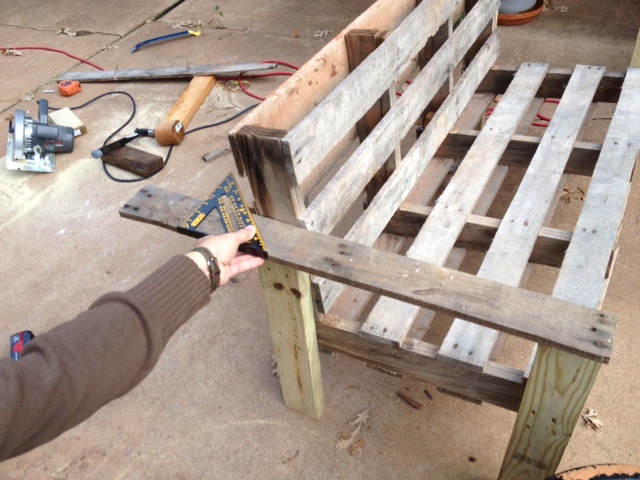
Remember that pallet slat I pried loose at the beginning of the project? In the photo, you can see I spanned over the bench legs, front and back, to make bench armrests. I cut off at an angle the left over bit hanging out past seat back, and finally ran two screws through the "arm" into the rear leg and front leg, fastening it to the bench. I found another pallet slat and did the same to the other side. If you don't have another slat free, feel free to canabalize one from the rear or underside of the bench and use it for the same purpose.
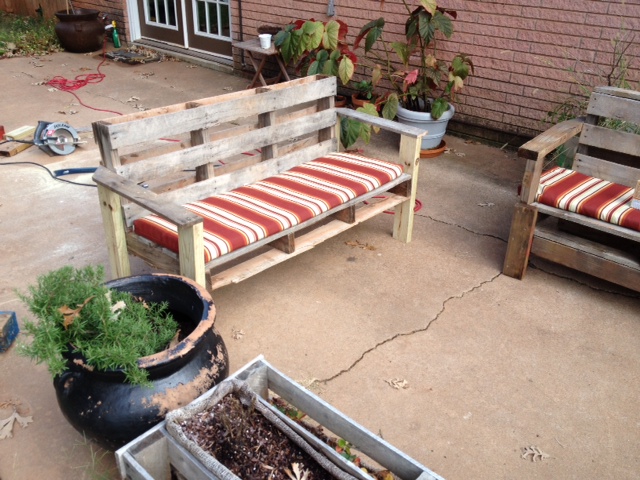
And now you have a bench!
I must say the bench is much more comfortable with a cushion, like these I picked up at Walmart in their outdoor center.
Step 5: Sit and enjoy!
If you are interested in what we do as a business, feel free to browse the website or contact one of our reps! Also, be sure to keep watching our social media channels on Facebook and Twitter.
If you would like more information about us or our products and services, please click the button below.
About R.K. Black, Inc.
R.K. Black, Inc. is an Oklahoma City-based, family-owned leading provider of office technology solutions to small and medium-sized businesses in Oklahoma and Kansas. We specialize in everything business technology from copier, fax, printer and scanner technology to document management, onsite paper shredding services, VoIP phone systems and managed IT support to video surveillance solutions.
If you want to learn more about us, feel free to explore the website, read our other blogs or click the button below to be contacted by one of our reps and tell you! Also, be sure to keep watching our social media channels on Facebook and Twitter for more business tips from our blog.


